March 14

KubeAdm with Local Kubernetes Repo for IPv6

V1.4

Goal

In working with my lazyjack tool to create IPv6 based Kubernetes clusters on bare metal systems, I wanted to run the latest code on master (1.10.0-beta.2 at this time) to run E2E tests and possibly tweak things. So, I needed to be able to run KubeAdm with my own repo, instead of using something prebuilt from upstream.

In addition, I wanted to make sure that I could do some customizing with lazyjack.


Preparation

As described in my blog post on lazyjack, I have a three node, bare-metal setup, with a second interface connected to a physical switch, for the Kubernetes management/pod network. The lazyjack tool is installed on the nodes and I have a config.yaml with the network topology, including all IP addresses desired. Developement tools (go, git, etc) are installed on the node used as the master node.

I’m using Ubuntu 16.04 on each of my systems.

Next, I pulled down the latest Kubernetes code:

mkdir -p ~/go/src/k8s.io
cd ~/go/src/k8s.io
git clone https://github.com/kubernetes/kubernetes.git
cd kubernetes


Now, we are ready to set things up to use this repo, for the Kuberentes cluster.


Steps

Repo Prep

I checked out a branch that had the version I wanted. At the time of this writing, beta 2 of 1.10 was available:

cd ~/go/src/k8s.io/kubernetes
git checkout -b release-1.10 origin/release-1.10
git checkout v1.10.0-beta.2


Building/Installing

Next, I built everything and installed kubectl, kubeadm, and kubelet binaries, so that we’re using the latest for everything. Restarted kubelet to get the new version running:

make clean
make
make release

cd _output/bin/
sudo cp kubeadm kubectl kubelet /usr/bin/
sudo systemctl daemon-reload
sudo systemctl restart kubelet


I copied these three binaries over to the two minion systems, placed them in /usr/bin, and restarted kubelet to update them as well.

For the release images, they are in TAR files, which can be loaded into docker:

cd ~/go/src/k8s.io/kubernetes/_output/release-images/amd64
for f in *.tar; do docker load -i $f; done


Startup Local Registry

The docker daemon needs to know about an insecure registry that is being created on one of the nodes. Create the following file on each system:

cat > /etc/docker/daemon.json <<EOT
{
    "insecure-registries": ["10.86.7.77:5000"]
}
EOT
systemctl restart docker


I guess I could have used the management IP for the master node ([fd00:20::2]), but I decided to use the admin interface IP of the machine on the lab network. In this case, it was 10.86.7.77. You would replace this, with your master node’s IP address.

On the master node, you want to start the local registry:

docker run -d -p 5000:5000 --restart always --name registry registry:2


Tagging images

Note: If there is an easier way than this (like some make target), please let me know…

After making the release and doing a docker load for each tar file, there are a bunch of images in the local registry. We need to tag these images with our master node’s IP and port 5000 (10.86.7.77:5000 in my case). This is a bit complicated, as most of the images built do not have the -amd64 suffix and the tag used has an underscore, which doesn’t play well in the sandbox. Hopefully there is an easier way, but this is what I did…

I first found out the list of images, by doing “docker images” to find out the tag that was created (e.g.v1.10.0-beta.2.17_3d19fe4010c246-dirty). Here’s the list of images:

k8s.gcr.io/hyperkube-amd64
gcr.io/google_containers/kube-apiserver
k8s.gcr.io/kube-apiserver
gcr.io/google_containers/kube-controller-manager
k8s.gcr.io/kube-controller-manager
gcr.io/google_containers/cloud-controller-manager
k8s.gcr.io/cloud-controller-manager
k8s.gcr.io/kube-aggregator
gcr.io/google_containers/kube-aggregator
gcr.io/google_containers/kube-scheduler
k8s.gcr.io/kube-scheduler
gcr.io/google_containers/kube-proxy
k8s.gcr.io/kube-proxy

With that, I could filter by the tag and build up the commands needed to tag these images for my local repo (10.86.7.77:5000). You can see that I had to strip out the registry name to just have the image name part for the local repo tag:

docker images \
    --format="docker tag {{.Repository}}:{{.Tag}} 10.86.7.77:5000/{{.Repository}}:v1.10.0-beta.2" | \
    grep v1.10.0-beta.2.17_3d19fe4010c246 | \
    sed -e "s?5000/gcr.io/google_containers?5000?" | \
    sed -e "s?5000/k8s.gcr.io?5000?" > x
chmod 777 x


You can do the same as above, only replace the tag (e.g.v1.10.0-beta.2.17_3d19fe4010c246-dirty) with what you have for a tag. Also, since we need images with the -amd64 suffix, the same command can be tweaked to create those tags too:

docker images \
    --format="docker tag {{.Repository}}:{{.Tag}} 10.86.7.77:5000/{{.Repository}}-amd64:v1.10.0-beta.2" | \
    grep v1.10.0-beta.2.17_3d19fe4010c246 | \
    sed -e "s?5000/gcr.io/google_containers?5000?" | \
    sed -e "s?5000/k8s.gcr.io?5000?" > y
chmod 777 y


Before invoking “y”, you need to pull the “hyperkube-amd64” line (first one?), as it already has the right suffix. Now, you can invoke these two files and create all the tags needed. Now, I don’t know if you need the tags in file “x” (other than the hyperkube-amd64), so you could try skipping running that file and just do the first line, along with running file “y”. In my Kubernetes cluster, I think all the images had the -amd64 suffix.


Pushing Images

With everything tagged, you can then push these images to your local repo. I did this command, to first check that I have the right syntax for my tags:

docker images | grep 10.86.7.77:5000
10.86.7.77:5000/hyperkube-amd64 v1.10.0-beta.2 351430a5275d 3 days ago 633 MB
10.86.7.77:5000/kube-apiserver v1.10.0-beta.2 2e8a0bd89199 3 days ago 224 MB
10.86.7.77:5000/kube-apiserver-amd64 v1.10.0-beta.2 2e8a0bd89199 3 days ago 224 MB
10.86.7.77:5000/kube-controller-manager v1.10.0-beta.2 80ea4fb85ccb 3 days ago 147 MB
10.86.7.77:5000/kube-controller-manager-amd64 v1.10.0-beta.2 80ea4fb85ccb 3 days ago 1
...


If that looks good (registry, image name, and tag), create and invoke the following file in order to push them up:

docker images --format="docker push {{.Repository}}:{{.Tag}}" | \
    grep 10.86.7.77:5000 > z
chmod 777 z
./z


Don’t Forget These Images…

Once I tried this all out, I hit a problem with missing images. It turns out that KubeAdm is using some older versions of etcd (3.2.16) and kube-dns (1.14.8) images. To be sure I had these in my local registry (because everything will come from there), I needed to handle these specially:

docker pull gcr.io/google_containers/etcd-amd64:3.2.16
docker tag gcr.io/google_containers/etcd-amd64:3.2.16 10.86.7.77:5000/etcd-amd64:3.2.16
docker push 10.86.7.77:5000/etcd-amd64:3.2.16
docker tag gcr.io/google_containers/k8s-dns-kube-dns-amd64:1.14.8 10.86.7.77:5000/k8s-dns-kube-dns-amd64:1.14.8
docker push 10.86.7.77:5000/k8s-dns-kube-dns-amd64:1.14.8
docker tag gcr.io/google_containers/k8s-dns-dnsmasq-nanny-amd64:1.14.8 10.86.7.77:5000/k8s-dns-dnsmasq-nanny-amd64:1.14.8
docker push 10.86.7.77:5000/k8s-dns-dnsmasq-nanny-amd64:1.14.8
docker tag gcr.io/google_containers/k8s-dns-sidecar-amd64:1.14.8 10.86.7.77:5000/k8s-dns-sidecar-amd64:1.14.8
docker push 10.86.7.77:5000/k8s-dns-sidecar-amd64:1.14.8

As you can see, I didn’t have the etcd image, and had to pull it first. You can check with “docker images” to see if you have to pull any images, before tagging and pushing. Note: For some systems, I’ve had to pull from k8s.gcr.io instead of gcr.io/google_containers.

The versions of etcd and kube-dns that KubeAdm uses are hard coded in the code, so I had to find out by trial and error. Looking at logs, I noticed that these pods were not coming up, and saw what image versions were being tried in the pulls (e.g. 10.86.7.77:5000/etcd-amd64:3.2.16). I would then, do a pull of that version from k8s.gcr.io or gcr.io/google_containers and push it up to my local repo.


Bringing Up The Cluster

To bring things up quickly, I’m using a current release (v1.0.6) of my lazyjack tool, but you can do the same manually, if you’re a masochist :). I installed it in /usr/local/bin so that it is in my path.

I created a config.yaml for my setup to represent the topology and addresses that I wanted to use (see lazyjack README.md for details on this file).

For this effort, we need to customize the generate kubeadm.conf file. As a convenience, I overrode the default work area to point to are area under the account I was using (though you can use the default /tmp/lazyjack/ area, if desired):

general:
   plugin: bridge
   work-area: "/home/c2/bare-metal/work-area"


I ran “sudo lazyjack init” to create the certificates needed and place them into the config.yaml file. I copied this updated YAML file to the minion nodes, which also have lazyjack installed.

Next, I ran “sudo lazyjack prepare” on the master, and each of the minion nodes. There should be bind9 and tayga containers running on the master, for the DNS64 and NAT64 servers, respectively. This step will also create a kubeadm.conf file in the work area.

To bring up the cluster with the local repo, we need to edit that file to change the kubernetesVersion line to the version tag we are using (instead of 1.9.0 that the tool created), and add the imageRepository line pointing to our repo. In this example, I used:

kubernetesVersion: v1.10.0-beta.2
imageRepository: 10.86.7.77:5000


Now, on the master, I ran “sudo lazyjack up”. This takes a few minutes, and the output should indicate success and provide the lines to setup kubectl:

mkdir -p $HOME/.kube
sudo cp -i /etc/kubernetes/admin.conf $HOME/.kube/config
sudo chown $(id -u):$(id -g) $HOME/.kube/config


Run kubectl and make sure that all the pods and services are up and running. Then, you can run the “up” command on the other nodes and check with kubectl that the nodes area “ready” and the additional proxy pods are running.

You should be able to then use your IPv6 based cluster, running code from your local repo!

Issues

Please be sure to use docker version 17.03, as versions 17.06, 17.09, 17.12, 18.03, and 18.04 are showing that, even with the host enabling IPv6, any containers created have IPv6 disabled. The effect seen is that the kube-dns pod is stuck in “creating” state, and logs show that the CNI plugin is failing to add an IPv6 address to the pod (permission denied error). This is true with any user create pods that use the pod network and need an IPv6 address from the CNI plugin. This is discussed in this CNI issue and in this docker issue.


Category: bare-metal, Kubernetes | Comments Off on KubeAdm with Local Kubernetes Repo for IPv6
March 6

Istio on IPv6 Kubernetes – Undiscovered Country

V1.2

Overview

Since I was able to get a Kubernetes cluster running with IPv6 only on bare metal, the next logical step was to give a go at trying to bring up Istio. Like the Star Trek movie, this was something untried, and my goal in this blog is to document my efforts to try Istio on IPv6 as a Proof of Concept (PoC). Spoiler: I have it working, but the road to make this a reality, will take quite a few code changes.

Update: Had presented a summary of IPv6 readiness at Istio Community Meeting 3-22-18 At 15:55 mark.

Assumptions

This isn’t for the faint at heart, but I’ll try to make it as cookbook as possible (granted, I need to verify this on a fresh setup, in case my memory failed me on some steps). That said, I expect that you have bare metal systems available, network topology set up, needed tools installed (e.g. Go, GIT, docker, lazyjack), accounts set up on github.com and hub.docker.com, and have installed the Kubernetes that you want to use (1.9+).

For my setup, I have three Ubuntu 16.04 machines, each with IPv4 access to the outside, and a separate interface connected to a switch for Kubernetes management and pod networks. Go is at 1.9.2. I have a cloned Kubernetes master branch on February 14th, 2018 (commit f33e0b3), and built all the needed apps. Kubectl, kubeadm, and kubelet are at v1.9.3 and placed in /usr/bin/. It’s not critical to have the latest and greatest here, as long as it is 1.9+ code.

For Istio, I tried to use the path of least resistance and decided to use NodePort, instead of LoadBalancer, and not to use authentication. I plan on trying MetalLB that I previous tried on a IPv4 cluster.


Starting point

Since I had my LazyJack tool working, I used that to bring up my cluster with IPv6. It uses the reference bridge plugin, and has static routes so that nodes can communicate with each other.  Here is the config.yaml that I used for my cluster:

plugin: bridge
topology:
 bxb-c2-77:
 interface: "enp10s0"
 opmodes: "master dns64 nat64"
 id: 2
 bxb-c2-78:
 interface: "enp9s0"
 opmodes: "minion"
 id: 3
 bxb-c2-79:
 interface: "enp10s0"
 opmodes: "minion"
 id: 4
support_net:
 cidr: "fd00:10::/64"
 v4cidr: "172.18.0.0/16"
mgmt_net:
 cidr: "fd00:20::/64"
pod_net:
 prefix: "fd00:40:0:0"
 size: 80
service_net:
 cidr: "fd00:30::/110"
nat64:
 v4_cidr: "172.18.0.128/25"
 v4_ip: "172.18.0.200"
 ip: "fd00:10::200"
dns64:
 remote_server: "64.102.6.247"
 cidr: "fd00:10:64:ff9b::/96"
 ip: "fd00:10::100"


Everything needed for this setup, was done by LazyJack in about five minutes, and worked just fine.  I have a Kubernetes cluster running IPv6. Now, let the hacking begin!


Istio Preparation

Using the Developer’s Guide as reference, and knowing I already had Go installed, I went right to cloning and setting up the Istio repo…

export ISTIO=$GOPATH/src/istio.io
export HUB="docker.io/pmichali"
export TAG=pmichali
export GITHUB_USER=pmichali
export KUBECONFIG=${HOME}/.kube/config

mkdir -p ~/go/src/github.com/istio.io
cd ~/go/src/github.com/istio.io
git clone https://github.com/istio/istio
cd istio


You would want to substitute “pmichali” with your github.com and hub.docker.com username (I did same for tag name). Do a “docker login” to your hub.docker.com account, so that pushes will work later on.

I checked out the latest from master and built everything. In this case, I’m using commit 18a20f9 from March 4th, 2018 and used a separate branch.

git checkout -b trial-20180305


Spam, Spam, Eggs, and Spam…

Here’s were the fun starts. Several changes are needed to support IPv6. It’s not really that many, however, there are a few changes that, to make them permanent, will require some larger effort. In addition, changes are needed to the sample apps, like BookInfo.

As a starting point, I have a  fork of Istio, where I’ve created an ipv6 branch that is based off of the March 4th, 2018 commit on master (18a20f9). You can take the latest commit (6299579) off of the ipv6 branch, or cherry pick the ones you want. I’ll make issues and submit PRs to Istio for the easy changes that I’ve made.

The first patch (commit a5451cd) modifies validation of proxy addresses in Pilot, to accept IPv6 addresses correctly.

The second patch (commit 0502713) changes the hostname to IP resolution in Pilot, to add the needed square brackets to IPv6 addresses (separating the port from IP part).

The third patch (commit e7e5d48) changes the bootstrap code, so that it can parse IPv6 for Pilot discovery, Zipkin, and statsd addresses that are stored in config.

The other bootstrap code patch (commit 21b82c4), changes a JSON template file, which has the side effect of altering the output of the test files. As a result, the patch also includes updated golden files, so that unit tests pass. For this to be upstreamed, we need to be able to test bootstrap with both IPv4 and IPv6, and have a way to allow deployment of the template file in either mode.

For the Envoy Pilot JSON file(commit 65dc3e9), the IP addresses are patched to use IPv6 addresses for localhost and any host. Like the previous patch, IPv6 is forced, and to upstream, this needs to be configurable, so that users can use either IPv4 or IPv6 mode.

There are two constants in Istio, which specify the wildcard and localhost addresses. This was patched (commit 814036f) so that IPv6 addresses are used.  Like the one bootstrap change, this affects the output of the golden files, so they are included in this commit (quite a few of them). Again to make this upstreamable, this should be configurable, so that users could enable IPv6 mode and use IPv6 addresses everywhere.

I forgot to run lint, before each commit, so I did another commit (commit b7302ab) to fix those warnings, although the actual upstream commits would have to fix these warnings, and do a cleaner fix than the quick and dirty changes I did.

That is it for the base Istio code. We’ll talk about the some of the sample applications later in the blog.


Build Everything

Now that the code is changed, and we have the minimum unit test modifications so that things will pass, build everything (you’ll need to do “docker login”, before doing the push):

make
make docker
make push

install/updateVersion.sh -a ${HUB},${TAG}


I edited install/kubernetes/istio.yaml so that it uses NodePort, instead of LoadBalancer (search and replace), and uncommented the line selecting port (32000).


The Moment of Truth

Bring up the Istio components:

kubectl apply -f install/kubernetes/istio.yaml


You should see that all the services and pods are up and running, and most importantly, that pods are not restarting or in a crash loop.  This is what I see on my setup:

$ kubectl get pods --all-namespaces -o wide
NAMESPACE      NAME                                READY     STATUS    RESTARTS   AGE       IP                   NODE
istio-system   istio-ca-5dfc8d9499-jlkdf           1/1       Running   0          10m       fd00:40::3:0:0:25f   bxb-c2-78
istio-system   istio-ingress-df5f9b947-rdn4g       1/1       Running   0          10m       fd00:40::4:0:0:12d   bxb-c2-79
istio-system   istio-mixer-7d95868d79-tmgf6        3/3       Running   0          10m       fd00:40::4:0:0:12c   bxb-c2-79
istio-system   istio-pilot-97d94c7f6-nr7nj         2/2       Running   0          10m       fd00:40::3:0:0:25e   bxb-c2-78
kube-system    etcd-bxb-c2-77                      1/1       Running   0          5h        fd00:20::2           bxb-c2-77
kube-system    kube-apiserver-bxb-c2-77            1/1       Running   0          5h        fd00:20::2           bxb-c2-77
kube-system    kube-controller-manager-bxb-c2-77   1/1       Running   0          5h        fd00:20::2           bxb-c2-77
kube-system    kube-dns-dcf744547-nzzr2            3/3       Running   0          5h        fd00:40::2:0:0:2d    bxb-c2-77
kube-system    kube-proxy-5vbjw                    1/1       Running   0          5h        fd00:20::3           bxb-c2-78
kube-system    kube-proxy-kf5cm                    1/1       Running   0          5h        fd00:20::4           bxb-c2-79
kube-system    kube-proxy-s479m                    1/1       Running   0          5h        fd00:20::2           bxb-c2-77
kube-system    kube-scheduler-bxb-c2-77            1/1       Running   0          5h        fd00:20::2           bxb-c2-77
$ kubectl get svc --all-namespaces -o wide
NAMESPACE      NAME            TYPE           CLUSTER-IP        EXTERNAL-IP   PORT(S)                                                            AGE       SELECTOR
default        kubernetes      ClusterIP      fd00:30::1                443/TCP                                                            5h        
istio-system   istio-ingress   LoadBalancer   fd00:30::2:1e82        80:30802/TCP,443:32379/TCP                                         10m       istio=ingress
istio-system   istio-mixer     ClusterIP      fd00:30::1:1fbc           9091/TCP,15004/TCP,9093/TCP,9094/TCP,9102/TCP,9125/UDP,42422/TCP   10m       istio=mixer
istio-system   istio-pilot     ClusterIP      fd00:30::3:ec89           15003/TCP,15005/TCP,15007/TCP,8080/TCP,9093/TCP,443/TCP            10m       istio=pilot
kube-system    kube-dns        ClusterIP      fd00:30::a                53/UDP,53/TCP                                                      5h        k8s-app=kube-dns


What About The Apps?

BookInfo

I’d be remiss, if I didn’t spin up the BookInfo app. After monkeying with this for a while, I realized that this app also needed some changes as well.

I did another patch (commit 4ea619d) that changes the bind address to “::” for book info, so it is listening on the the right IP/port. Also, since I was modifying the app, I needed a way to modify the images that were created, to use my changes. I updated the build_push_update_images.sh script to push the images created, to my repo (instead of docker.io/istio).

With this commit, I ran the script and provided a dummy version:

cd ~/go/src/istio.io/istio/samples/bookinfo
./build_push_update_images.sh 0.0.0
cd ../..
kubectl create -f install/kubernetes/istio-sidecar-injector-configmap-debug.yaml
kubectl apply -f <(istioctl kube-inject -f samples/bookinfo/kube/bookinfo.yaml --injectConfigMapName istio-inject)


Once everything is up, you can access the BookInfo productpage, by using the service IP or pod network IP and the port (9080). For example:

kubectl get svc --all-namespaces | grep productpage
default productpage ClusterIP fd00:30::2:8091 <none> 9080/TCP

curl [fd00:30::2:8091]:9080


To upstream, this app needs to be modified so that the user can select between an IPv4 and IPv6 variant.

Helloworld

This app also needed to be modified to listen on the IPv6 any address, so another patch was committed (commit 6299579).  New images are created:

cd ~/go/src/istio.io/istio/samples/helloworld/src/
./build_service.sh


Then, I would tag and push the two images to my docker hub area:

docker tag istio/examples-helloworld-v1:latest docker.io/pmichali/examples-helloworld-v1:pmichali
docker tag istio/examples-helloworld-v2:latest docker.io/pmichali/examples-helloworld-v2:pmichali

docker push pmichali/examples-helloworld-v1
docker push pmichali/examples-helloworld-v2


Prior to applying the ~/go/src/istio.io/istio/samples/helloworld/helloworld.yaml, I modified it (in two places) to point to my images (e.g. docker.io/pmichali/examples-helloworld-v1:pmichali anddocker.io/pmichali/examples-helloworld-v2:pmichali) and I changed the imagePullPolicy to Always. The final step, is to then apply this YAML file:

cd ~/go/src/istio.io/istio/samples/helloworld/
kubectl apply -f helloworld.yaml


With this app, there is a nodeport, so you can access it from the service or pod network IP and port 5000, or the node IP using the nodeport:

kubectl get svc | grep helloworld
helloworld    NodePort    fd00:30::76ae             5000:30780/TCP   5m

kubectl get pods --all-namespaces -o wide | grep helloworld
default        helloworld-v1-6759b98975-c6vft      1/1       Running   0          4m        fd00:40::4:0:0:131   bxb-c2-79
default        helloworld-v2-7c6c464dc-g2pcl       1/1       Running   0          4m        fd00:40::3:0:0:263   bxb-c2-78

$ curl [fd00:30::76ae]:5000/hello
Hello version: v1, instance: helloworld-v1-6759b98975-c6vft
$ curl [fd00:40::3:0:0:263]:5000/hello
Hello version: v2, instance: helloworld-v2-7c6c464dc-g2pcl
$ curl [fd00:20::3]:30780/hello
Hello version: v2, instance: helloworld-v2-7c6c464dc-g2pcl


This app should be modified so that the IP mode is configurable.


Cleanup

For the apps, you can do:

cd ~/go/src/istio.io/istio/samples/helloworld/
kubectl delete -f helloworld.yaml
cd ~/go/src/istio.io/istio/
kubectl delete -f <(istioctl kube-inject -f samples/bookinfo/kube/bookinfo.yaml --injectConfigMapName istio-inject)


For Istio, run:

cd ~/go/src/istio.io/istio/
kubectl delete -f install/kubernetes/istio.yaml


To bring down Kubernetes, you can use “sudo lazyjack down” on minions and then master mode. Follow this with “sudo layjack clean” to remove everything related to the provisioning for Kubernetes.


Final Notes/Observations

I was noticing that, with the BookInfo app, I could “curl” to port 9080, using the service IP and the pod network IP, but I was unable to curl to the app from port 9080 using the node IP address. Also, the service didn’t show a nodeport for BookInfo, and using 32000 did not work either. I didn’t see the NodePort type called out in any of the YAML files. I not sure if there should have been a nodeport defined or if that should work.

With the helloworld app, I could access it from port 5000 using the service and pod IPs, and from port 32677 (shown for the service) using the node’s IP. This worked as expected.

The needed code changes will be easy, in fact, I plan on cleaning up what I have (and adding UTs for the changes). For the JSON and YAML file changes, some form of templating mechanism will be needed to allow operation in either IPv4 or IPv6 mode.

Keep in mind, that if you need to do some iterations on code changes, make sure that the deployment YAML files are set to “Always” pull images, or you need to ensure each node gets the updated version. I would do the following on my nodes (sometimes with the -f option):

docker rmi `docker images --format="{{.ID}} {{.Repository}} {{.Tag}}" | grep pmichali | cut -f 1 -d" "`
docker rmi `docker images --format="{{.ID}} {{.Repository}} {{.Tag}}" | grep istio| cut -f 1 -d" "`
docker rmi `docker images --format="{{.ID}} {{.Repository}} {{.Tag}}" | grep helloworld | cut -f 1 -d" "`
docker rmi `docker images --format="{{.ID}} {{.Repository}} {{.Tag}}" | grep bookinfo | cut -f 1 -d" "`


Also, if you run the updateVersion.sh script, you’ll need to make sure that istio.yaml has NodePort set, instead of LoadBalancer, and the port 32000 line uncommented.

Some thought will be needed on how to setup the samples for either IPv4 or IPv6 mode of operation.

Category: bare-metal, Istio, Kubernetes | Comments Off on Istio on IPv6 Kubernetes – Undiscovered Country
February 19

Lazyjack – Provisioning bare-metal for IPv6 Kubernetes

v1.4

I’ve been experimenting with IPv6, Kubernetes, and Istio using Docker-In-Docker. One difficulty I’ve been having is accessing the cluster externally, as the whole cluster is running in docker containers on one VM.

I decided to try to get Kubernetes running on multiple bare-metal nodes. Well, this turned out to be quite challenging, as there are many configuration settings and tweaks needed to make this work.

Not wanting to have to endure that agony, each time I set things up, or spend hours with others’ who want to do the same thing, I decided to write a small Go app to automate this setup. Lazyjack is the culmination of that effort.

You can find details on how to set up and use Lazyjack from the Github repo, but I’ll run through the steps here, using a two system setup I have in a lab.


Step 1: Get Everything Needed

Hardware: I already had two Ubuntu 16.04 systems, each with a pair of interfaces, one for SSH access to the box for provisioning, and one connected to an L2 switch, which would be used for the “management” network for Kubernetes. This second interface was new, and didn’t have any configuration on it.

Both boxes have access to the Internet (V4, using NAT in the lab), so that I can access repos and pull down stuff.

Update: If you want to be able to access remote IPv6 sites, without doing NAT64 (and using their IPv4 address), enable IPv6 and forwarding on each node, with an IPv6 address on the main interface. If using SLAAC, ensure system_ra=2 for the main interface, using sysctl.

Software: Being development systems, docker 17.03.2-ce and Go 1.9.2 were installed. I think these systems already had openssl installed. Likewise, Kubernetes was installed (sudo apt-get install kubernetes kubelet kubeadm) on these systems.

Update: You should install CNI v0.7.1+ on the systems, otherwise, there may be issues with IPv6 support (e.g. ip6tables configuration).

Lazyjack: The easiest way is to download the latest release, untar, and place the executable in your system path on each system.  For example, for the first release:

mkdir ~/bare-metal
cd ~/bare-metal
wget https://github.com/pmichali/lazyjack/releases/download/v1.0.0/lazyjack_1.0.0_linux_amd64.tar.gz
tar -xzf lazyjack_1.0.0_linux_amd64.tar.gz
sudo cp lazyjack /usr/local/bin


Note: The tar file name may be different, based on the version of lazyjack you use.

Alternately, you can get the repo:

go get github.com/pmichali/lazyjack

build it:

cd ~/go/src/github.com/pmichali/lazyjack
go build cmd/lazyjack.go


And then move the executable to your system path on each system. The sample-config.yaml can be used as a template for the configuration.


Step 2: Create a Configuration File

I’m lazy, on the system I was going to use as the master node, I just took the sample-config.yaml, and renamed it config.yaml. That file has the following network definitions already set up:

Management network –  fd00:20::/64

Support network – fd00:10::/64

Pod network – fd00:40:0:0:X/80

Service network – fd00:30::/110

DNS64 network –  fd00:64:ff9b::/96

The only thing I needed to do was identify the hostnames I was using, and the interface name for the interface that would be used for the management network. The definitions I used were:

topology:
    bxb-c2-77:
        interface: "enp10s0"
        opmodes: "master dns64 nat64"
        id: 2
    bxb-c2-79:
        interface: "enp10s0"
        opmodes: "minion"
        id: 3
support_net:


As you can see, bxb-c2-77 will be the master node, and it will have dns64 and nat64 containers running on it, to support IPv6 on the cluster. The sole minion is bxb-c2-79, but you can clearly more nodes listed here. Likewise, you can use a separate node for the dns64 and nat64 services.

Each node has a unique (and arbitrary), ID from 2-65535 (but why use huge numbers?).

Update: You can configure DNS64 to allow use of IPv6 addresses, so that we can directly access external sites that support IPv6:

dns64:
    allow_ipv6_use: true


With that, we are ready to get things rolling…


Step 3: Initialize For Kubernetes

On the master (bxb-c2-77 in my case), run lazyjack (I’m assuming it is in your path) with the init command (from the area where the config.yaml file is, so that you don’t have to specify the location):

sudo lazyjack init


Yes, you need to run all lazyjack commands as root, because privileged access is needed to various resources. If you don’t run as root, you’ll see a permission denied error.

If you are curious as to what it does, you can add the “-v 4” option, before the “init” argument.

This command will create needed certificates and keys needed for Kubernetes, and will place information into the configuration file (config.yaml), with a .bak preserving the previous version (multiple runs of this command will overwrite that, BTW). Also, the file will be, obviously, owned by root, but the permission changed to 0777, so that you can edit the file, if needed later.

You must copy the configuration file to all other nodes, now that it has the updated information.


Step 4: Prepare the Systems

Running lazyjack with the “prepare” command, will get a system ready for running Kubernetes. Run this command on each node.

Note: this command will generate a kubeadm.conf file in the work area (default /tmp/lazyjack) of the master node. If desired, you can customize this file to specify different settings desired for the cluster. For example, you can change the kubernetesVersion line, to pick a different version than 1.9.0 that was generated.


Step 5: Cluster Bring-up – Master First

On the master, run lazyjack with the “up” command. This will take a few minutes, as it starts up KubeAdm. Once completed, you can setup kubectl by doing:

mkdir -p $HOME/.kube
sudo cp -i /etc/kubernetes/admin.conf $HOME/.kube/config
sudo chown $(id -u):$(id -g) $HOME/.kube/config


On subsequent runs, I usually do a “rm -rf ~/.kube”, prior to these commands.

Now, you can run “kubectl get nodes -o wide” to see that this node is up, and “kubectl get pods –all-namespaces -o wide”, to see when Kubernetes is fully up. You’ll see something like this:

NAMESPACE   NAME                              READY  STATUS   RESTARTS AGE IP                NODE
kube-system etcd-bxb-c2-77                    1/1    Running  0        2m  fd00:20::2        bxb-c2-77
kube-system kube-apiserver-bxb-c2-77          1/1    Running  0        2m  fd00:20::2        bxb-c2-77
kube-system kube-controller-manager-bxb-c2-77 1/1    Running  0        2m  fd00:20::2        bxb-c2-77
kube-system kube-dns-dcf744547-k56t2          3/3    Running  0        3m  fd00:40::2:0:0:29 bxb-c2-77
kube-system kube-proxy-m9z9m                  1/1    Running  0        3m  fd00:20::2        bxb-c2-77
kube-system kube-scheduler-bxb-c2-77          1/1    Running  0        2m  fd00:20::2        bxb-c2-77


You can untaint the master, if you want to be able to create pods on that node.


Step 6: Cluster Bring-up – Minions

After you are sure that the master is completely up (all pods and services running), go onto each of the minion nodes, and run the same “up” command. The command should complete quickly, and you can check the status of the node, using the “kubectl get nodes” command on the master. It does take a bit for the minions to become ready. Likewise, you can use the “kubectl get pod” output to see that a proxy is running for each minion.

Note: The reason we don’t do all of the steps on one node, is because lazyjack will setup static routes to other nodes, and the interfaces must be set up on those systems first.


Step 7: Enjoy!

That’s it. You can now play with Kubernetes, creating pods that will have IPv6 addresses, and who should be able to ping6 to other pods on other nodes and have external access to the Internet.


Step 8: Cleanup

You can run the “down” and then “clean” commands on each minon, and then the master to clean things up.


Troubleshooting

Problems Bringing Up a Minion

If the “up” command on a minion fails, you can retry it with “-v 4” to see verbose output. Then, you can manually perform some of the steps that are shown. In one case, I had kubeadm join failing and when running manually, I saw:

c2@bxb-c2-78:~/bare-metal$ sudo kubeadm join --token ...
[preflight] Running pre-flight checks.
 [WARNING FileExisting-crictl]: crictl not found in system path
[preflight] Some fatal errors occurred:
 [ERROR Port-10250]: Port 10250 is in use


This occurs when the kubelet service is already running and using that port.  You can stop the service, and then do the “lazyjack up” command or, just run the “down” and then “up” command and that should reload the daemon, and restart the service.


Category: bare-metal, Go, Istio, Kubernetes, Linux | Comments Off on Lazyjack – Provisioning bare-metal for IPv6 Kubernetes
January 23

Istio, Kubernetes with Load Balancer, on Bare Metal…Oh My!

V1.0 01/23/2018

I found a load balancer that works on bare-metal and decided to do a quick write-up of my findings. This blog assumes that you have a basic understanding on how to bring up Kubernetes and Istio, so I won’t go into the nitty gritty details on those steps.


Preparations

The following information indicates the versions used (others may work – this is just what I used), and the basic infrastructure.

For hardware, I used two Cisco UCS blades as the hosts for my cluster, with one acting as master and one acting as a minion. On each system, the following was installed/setup…

  • Ubuntu 16.04 64 bit server OS.
  • Go version 1.9.2.
  • KubeAdm, kubelet, and kubectl v1.9.2.
  • Docker version 17.03.2-ce.
  • Account set up on hub.docker.com for docker registry.
  • Using Istio master branch, cloned on January 22nd 2018 (commit 23306b5)
  • Hosts on lab network with access externally.
  • Four available IPs for external IP pool.


Step 1: Bring Up KubeAdm

For Kubernetes, I used the reference bridge plugin, which needs a CNI config file and static route on each host. On the minion, I did this:

cat >/etc/cni/net.d/cni2.conf<<EOT
{
    "cniVersion": "0.3.0",
    "name": "dindnet",
    "type": "bridge",
    "bridge": "dind0",
    "isDefaultGateway": true,
    "ipMasq": false,
    "hairpinMode": true,
    "ipam": {
        "type": "host-local",
        "ranges": [
          [
            {
              "subnet": "10.193.0.0/16",
              "gateway": "10.193.0.1"
            }
          ]
        ]
    }
}

sudo ip route add 10.192.0.0/16 via <ip-of-master>

On the master, I did:

cat >/etc/cni/net.d/cni2.conf<<EOT
{
    "cniVersion": "0.3.0",
    "name": "dindnet",
    "type": "bridge",
    "bridge": "dind0",
    "isDefaultGateway": true,
    "ipMasq": false,
    "hairpinMode": true,
    "ipam": {
        "type": "host-local",
        "ranges": [
          [
            {
              "subnet": "10.192.0.0/16",
              "gateway": "10.192.0.1"
            }
          ]
        ]
    }
}
EOT

sudo ip route add 10.193.0.0/16 via <ip-of-minion>


On the master, I created this kubeadm.conf file, which has configuration lines for Istio (and specifies the IP of the master for advertised address):

cat >kubeadm.conf<<EOT
apiVersion: kubeadm.k8s.io/v1alpha1
kind: MasterConfiguration
kubernetesVersion: v1.9.0
api:
 advertiseAddress: "<ip-of-master>"
networking:
 serviceSubnet: "10.96.0.0/12"
tokenTTL: 0s
apiServerExtraArgs:
 insecure-bind-address: "0.0.0.0"
 insecure-port: "8080"
 runtime-config: "admissionregistration.k8s.io/v1alpha1"
 feature-gates: AllAlpha=true
EOT


With all the pieces in place, the master node was brought up with:

sudo kubeadm init --config kubeadm.conf


Then, the minion was joined by using the command output from the init invocation on the master (using sudo). Back on the master, I did the obligatory commands to access the cluster with kubectl, and made sure everything was up OK:

mkdir -p $HOME/.kube
sudo cp -i /etc/kubernetes/admin.conf $HOME/.kube/config
sudo chown $(id -u):$(id -g) $HOME/.kube/config

Step 2: Start Up Load Balancer

I cloned the repo for MetalLB and then applied the metallb.yaml file, but you can do what the install page shows:

kubectl apply -f https://raw.githubusercontent.com/google/metallb/v0.3.1/manifests/metallb.yaml


I decided to use the ARP method, instead of BGP, as the setup is super easy. Using the example they provided, I created this config file:

apiVersion: v1
kind: ConfigMap
metadata:
 namespace: metallb-system
 name: config
data:
 config: |
   address-pools:
   - name: my-ip-space
     protocol: arp
     arp-network: <start-ip-of-subnet>/26
     cidr:
     - <start-ip-of-pool>/30

If my systems were on a /24 subnet, I wouldn’t have needed the arp-network line. Under “cidr” the start address of the pool and the prefix is specified.

I applied the yaml file using kubectl and made sure that the metallb controller and speaker pods were running. You can check the log of the speaker to ensure that things started up OK, and later to see if IPs are being assigned:

kubectl logs -l app=speaker -n metallb-system


Step 3: Start Up Istio

I followed the instructions in the Istio Dev Guide page, to build and start up Istio.

The repo was pulled and a branch created based on the latest from the master branch. I  built the code and pushed to my docker repository, ran updateVersion.sh, and then started Istio with:

kubectl apply -f install/kubernetes/istio.yaml
kubectl apply -f install/kubernetes/istio-initializer.yaml

I verified that everything was runing, and that the istio-ingress service was using the LoadBalancer type and had the first IP address from the pool defined for MetalLB as the external IP. The speaker log for metalLB will show that an IP was assigned.


Step 4: BookInfo

We would be remiss, if we didn’t start up the book info application and then try to access the product page using the external address:

kubectl apply -f samples/bookinfo/kube/bookinfo.yaml


After this is running, I opened my browser window on my laptop, and went to http://<external-ip>/productpage/ to view the app!


Ramblings

The MetalLB setup was painless and worked well. I haven’t tried with /31 for the pool, but it does work with /29 and I suspect larger sizes. I also didn’t try using BGP, instead of ARP.


Category: bare-metal, Istio, Kubernetes | Comments Off on Istio, Kubernetes with Load Balancer, on Bare Metal…Oh My!
August 9

IPv6 Support for Docker In Docker

V1.16 – June 11th 2018

Goals

To be able to use Docker-In-Docker (DinD) to bring up a cluster with IPv6 only networking. This would work in an environment where the cluster is connected to an IPv4 only network. This allows DinD to be used for running IPv6 based end-to-end(E2E) tests with Google Cloud Platform.

These instructions are for early adopters, who want to start playing with IPv6 clusters.

Background

DinD allows you to create a multi-node cluster, using containers for the nodes, instead of VMs. It leverages off of KubeAdm and provides a quick an easy way to setup a cluster for testing and development.

For the team I am on, we wanted to leverage off of this to be able to setup a cluster with support for IPv6 on pods created (and later for the cluster infrastructure). We’re targeting using DinD for E2E testing of IPv6 logic for Kubernetes. This will work with running DinD using local resources or Google Compute Engine. For this blog entry, we’ll use local resources to start things up, and a bare-metal server running Ubuntu as the host.

DinD supports several CNI plugins, but for the purposes of IPv6 clusters, we’ll use the default bridge and host-local v0.7.1+ CNI plugins that have been tested with IPv6 support.

The DinD modifications also include DNS64 and NAT64 containers. These are used so that an IPv6 only cluster can be connected to an IPv4 outside world. Every DNS lookup will go to the DNS64 server, which will use a remote DNS server (customizable) to obtain the IPv4 address for the host (A record). From that, an IPv4-embedded IPv6 address, with a specific prefix, will be generated and used.  When NAT64 sees this prefix, it will handle V6 to V4 address translation to be able to access the external host.

Update: If your topology supports accessing the Internet via IPv6, you can now set the environment variable DIND_ALLOW_AAAA_USE to true, and when a DNS lookup occurs for an external site that supports IPv6, the AAAA record will be used. This allows pods in the cluster to directly access the site, without using an IPv4-embedded IPv6 address and NAT64.


Preparations

For this exercise, I’ll describe how to do this using Ubuntu 16.04 on a bare metal system, but have also played with this on both native Mac (doesn’t support IPv6) and inside a Ubuntu VM running under Vagrant/VirtualBox. You can adapt this for other operating systems as needed.

Tools

I’m using Go version 1.10 and docker version 17.03.2-ce (though have used 17.09.0-ce and 17.11.0-ce too). Note: I had used docker.io 1.13.1 and was seeing an error applying iptables rules, early in the process.

You’ll want git, liblz4-tool (“brew install lz4” for Mac), build-essential (for “make”), and sha1sum (should be there on Ubuntu, “brew install md5sha1sum” on Mac). Some of these are needed, if you plan on updating the DinD code.

Obtain the DinD Code

The IPv6 changes are upstreamed now, so you can clone the latest DinD repo:

cd
git clone https://github.com/kubernetes-sigs/kubeadm-dind-cluster dind


Obtain the Kubernetes Code and Add IPv6 Patches

Since we want to use the latest Kubernetes code, instead of 1.6, 1.7, or 1.8, which are provided with DinD, we need to clone the repo:

cd ~/dind
git clone https://github.com/kubernetes/kubernetes.git
cd kubernetes


Since, we’ll want to use this Kubernetes repo with changes, we’ll set environment variables to indicate to build from the local repo:

export BUILD_KUBEADM=y
export BUILD_HYPERKUBE=y


Additional Setup

On your host, make sure that IPv6 is enabled and IPv6 forwarding. You can do this using:

sysctl -w net.ipv6.conf.all.disable_ipv6=0
sysctl -w net.ipv6.conf.all.forwarding=1


Configuration

For IPv6 only mode, all you need is to set the environment variable IP_MODE to “ipv6”. However, there are several environment variables that you can export to customize things:

Environment Variable Example value Description
DIND_SUBNET fd00:77:: For IPv6 only mode, to specify the subnet (default is fd00:10::).
REMOTE_DNS64_V4SERVER DNS server that will receive forwarded DNS64 requests for external systems (default is 8.8.8.8). Note: I was using a lab system, and needed to use a local DNS, as it was not forwarding requests to an external DNS.
DNS64_PREFIX fd00:77:64:ff9b:: Prefix that will be used for all DNS resolutions by the built-in DNS64 server (default is 64:ff9b::).
SERVICE_CIDR fd00:77:30::/110 Subnet used for service pods (default is fd00:30::/110).


See dind-cluster.sh for other environment variables that can be customized, if you have special requirements.


Usage

Once the environment variables are set, a cluster can now be brought up, by using the following commands:

export IP_MODE=ipv6
cd ~/dind/kubernetes
../dind-cluster.sh up


You can then create pods, access them, and ping across nodes to other pods, and access external sites. The kubectl command can be run from the host, so you don’t have to access the master node.

When invoking other dind-cluster.sh commands (e.g. down, clean, routes), be sure to run them from the Kubernetes area (e.g. ~/dind/kubernetes/).

If you see a problem with the kube-proxy pod not coming up, take a look at “Kube-proxy failures – The Saga of Conntrack Max” section below for how to resolve this.

Note: The default for IP_MODE is “ipv4”, which brings up an IPv4 only cluster.


Rebuild Sequence

Say you have modified some of the Kubernetes code and want to recreate the cluster (after you have brought it down and cleaned). Here are the steps I did, from a setup which already has the DinD code and Kubernetes area, but additional changes have been made to Kubernetes code.

First, I’ll set all the environment variables that I happen to use, just because I’m starting in a new window:

cd ~/dind export IP_MODE=ipv6 export BUILD_KUBEADM=y export BUILD_HYPERKUBE=y

In my lab system, I wanted to use different IPs, and need to use a local DNS server, I did these settings as well:

export REMOTE_DNS64_V4SERVER=64.102.6.247
export DNS64_PREFIX=fd00:77:64:ff9b::
export DIND_SUBNET=fd00:77::
export SERVICE_CIDR=fd00:77:30::/110


Finally, the cluster can be brought up:

cd kubernetes
../dind-cluster.sh up


If another change is needed, you can do “../dind-cluster.sh clean”, update the Kubernetes code, and then run “../dind-cluster.sh up”.


Using Google Compute Engine

If you want to use Google Cloud Platform, setup an account (see my recent blog post on this) and then set the GOOGLE_APPLICATION_CREDENTIALS environment variable to point to the JSON file with credentials.

There is an example script, gce-setup.sh that can be used as an example for how to use DinD with GCE. For IPv6, you can set the following environment variables and then source the script (from the top of the kubernetes repo, since we are using a local repo for the latest Kubernetes code).

export IP_MODE=ipv6
export BUILD_KUBEADM=y
export BUILD_HYPERKUBE=y

# Set additional env variables as mentioned above, if desired.
cd ~/dind/kubernetes
source ../gce-setup.sh


If you are a developer, and want to use customized DinD code, you can set the following flag, to tell DinD to build and use the custom (local) DinD image:

export DIND_IMAGE=mirantis/kubeadm-dind-cluster:local


Note: GCE currently only has IPv4 access to the outside world, so the DIND_ALLOW_AAAA_USE flag cannot be set, and all accesses to external sites will use NAT64.


Restrictions/Limitations

IPv6 and MacOS

Curently, docker on the Mac, does not support IPv6, so you cannot run DinD directly on the Mac in IPv6 mode. You can however, spin up a Ubuntu VM (e.g. VirtualBox) and run DinD inside that VM.


Kube-proxy failures – The Saga of Conntrack Max

Kube-proxy, upon startup, checks the conntrack max setting, and if it is more than four times larger than the hashsize, will attempt to increase the conntrack hashsize. For most cases, like GCE or a VM on a Mac, this will not occur. However, if you have a large system with many CPUs, then this adjustment will be attempted.

Unfortunately, there is a docker bug () where, in a nested docker environment (like DinD), the update fails.  Kube-proxy checks to see if the file system is writeable (it says it is), and then tries to update a file and fails with a read-only error. The kube-proxy log will show this message:

write /sys/module/nf_conntrack/parameters/hashsize: operation not supported


DinD attempted to work-around this problem, by telling kube-proxy, via command line settings, to skip changing any settings related to conntrack. Unfortunately, kube-proxy was recently changed, such that the config file, if present (it is with Kubernetes 1.9+), will take precedence over the CLI settings. The config file does not have any settings for conntrack, and so defaults are used, which on some systems will cause kube-proxy to attempt to update the hash size (and it fails).

For example, I have a system with 32 CPUs and kube-proxy uses a default conntrack value of 32768 for max-per-core. We end up with a conntrack value of 1048576 (32768 * 32), which is more than four times the system’s hashsize of 65536.

I created issue #50 in the kubeadmin-dind-cluster project to address the problem. This issue has a patch for Kubeadm, which can be used as a temporary workaround on systems that exhibit the kube-proxy crash, when attempting to update hashsize. If you see the kube-proxy crash with docker log messages like below, you can include the patch from the issue into the code:

I1130 18:53:44.150679 1 conntrack.go:52] Setting nf_conntrack_max to 1048576
I1130 18:53:44.152679 1 conntrack.go:83] Setting conntrack hashsize to 262144
error: write /sys/module/nf_conntrack/parameters/hashsize: operation not supported


An alternative to doing a patch, is to look at the hashsize value trying to being set (e.g. 262144), and setting that manually on the host, before doing “dind-cluster.sh up”. For example:

sudo su
echo "262144" > /sys/module/nf_conntrack/parameters/hashsize
cat /sys/module/nf_conntrack/parameters/hashsize


NAT64 Container

For NAT64, a Tayga container built by Daneyon Hansen is used. It has a private IPv4 pool for mapping local IPv6 addresses to IPv4 addresses that can be NATed, and used for external site access. The pool is set to a /25 (126 hosts) subnet. If a larger pool is needed, the container would need modifications.


Lab Systems and DNS

You may see a case where DNS64 is unable to forward the DNS requests to an outside system like 8.8.8.8. In those cases, I’ve had success with using a company DNS server instead. Hence the programmable setting REMOTE_DNS64_V4SERVER. 🙂


Warning on noswap

When you bring up/tear down a cluster, you may see this warning about swap:

WARNING: No swap limit support


I’ve seen the warning on Ubuntu 16.04, and it was benign, however other people have seen issues with bringing up the cluster under CentOS 7.

To deal with this, you can check what devices are listed in the output of “cat /proc/swaps”. If there is an entry, you can turn off swap, by running the follow command (showing example for /dev/dm-1):

swapoff -v /dev/dm-1
rm /dev/dm-1


Category: Kubernetes | Comments Off on IPv6 Support for Docker In Docker
July 20

Docker In Docker with GCE

V0.03

My previous post mentioned about setting up Docker in Docker (DinD). This one builds upon that, using Google Compute Engine (GCE) in the workflow, with the goal of running End-to-End (E2E) tests. A local host will be used for all the DinD development, and GCE will be used to bring up the cluster running the nodes in a GCE VM.

I’m going to give it a try on native MacOS, a VM running on a Mac (using Vagrant and VirtualBox), and eventually a bare metal system. BTW, Google has some getting starting information on the GCP, GCE, and other tools.

This journey will involve incrementally working up to the desired result. There’s a lot to do, so let’s get started…


Google Compute Engine

Account Setup

The first step is to setup a Google Cloud Platform account. You can sign up for a free trial and get a $300 credit, usable for the first 12 months. They won’t auto-charge your credit card, after the trial period ends.

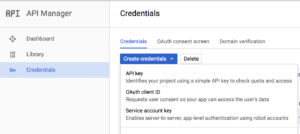
As part of the “Getting Started” steps, I went to the API Credentials page and created and API key:

The next step is to create the “Service Account Key” and set roles for it. For now, I think you can skip these steps and proceed in the process, as I have not identified the right roles settings to create a VM instance. Instead, there are steps in the “Cloud SDK” section below, where an auth login is done, and that seems to set the correct roles to be able to create a VM.

For reference, the steps for the service key are to first select the “Service Account Key” from the pull-down menu:

Google has info on how to create the key. I selected a role as project owner for the service account. I suspect there are more roles that are needed here. Next, select to create a JSON file.

Take the downloaded JSON file and save it somewhere (I just put it in the same directory as the DinD repo). Specify this file in the environment variable setting for GCE, for example:

export GOOGLE_APPLICATION_CREDENTIALS=~/workspace/dind/<downloaded-file>.json


Just note that you either set the GOOGLE_APPLICATION_CREDENTIALS, or you use the “auth login” step below. If this environment variable is set, when doing the auth login, you’ll get an error.


Host Setup/Installs

Before we can go very far there are some things that need to be setup…

Make sure that your OS is up-to-date (Ubuntu: “sudo apt-get update -y && sudo apt-get upgrade -y”). Beyond any development tools (e.g. go, git) you may want to have around, there are some specific tools that need to be installed for using DinD and GCE.


DinD and Kubernetes Repos

For DinD, you can do:

git clone https://github.com/Mirantis/kubeadm-dind-cluster.git dind


Ubuntu: I place this under my home directory, ~/dind.

Native Mac: I happened to place it at ~/workspace/dind.

For Kubernetes, go to your Go source area, create a k8s.io subdirectory, and clone the repo:

git clone https://github.com/kubernetes/kubernetes.git


Install docker and docker-machine

Docker should be the latest (17.06.0-ce) and docker-machine needs to be 0.12.1 or later, due to some bugs. Install docker…

Ubuntu: Use the steps from KubeAdm Docker In Docker blog notes. Be sure to enable user to run docker without sudo. Check the version with “docker version”.

Native Mac: Install Docker For Mac. This will install docker and docker-machine, but you need to check the versions. Most likely (as of this writing),  you’ll need to update docker-machine.

For docker-machine, you can install with:

curl -L https://github.com/docker/machine/releases/download/v0.12.1/docker-machine-`uname -s`-`uname -m` >/tmp/docker-machine
chmod +x /tmp/docker-machine
sudo cp /tmp/docker-machine /usr/local/bin/docker-machine


Cloud SDK

Instructions on cloud.google.com state to install/update to python 2.7, if you don’t have it already. Next, download the SDK package and extract:

wget https://dl.google.com/dl/cloudsdk/channels/rapid/downloads/google-cloud-sdk-162.0.0-darwin-x86_64.tar.gz
tar xzf google-cloud-sdk-162.0.0-darwin-x86_64.tar.gz

You can run google-cloud-sdk/install.sh to setup the path at login to include the tools. Log out and back in, so that the changes take effect.

Now, you can run “gcloud init” and follow the instructions to initialize everything…

I used the existing project that was defined for my Google Cloud account, when the account was created. I selected to enable GCE. For zone/region, I picked one for US east coast.

Ubuntu: As part of this process, the script asked me to go to a URL with my browser, and once I logged in using my Google account, and gave Google Cloud access, a key was displayed to paste into the prompt and compete init.

Now, “gcloud info” and “gcloud help” can be run to see the operations available. For authentication with API, I did:

gcloud auth application-default login

Native Mac: This brings up a browser window pointed to a URL where you log in and give access to the SDK.

Ubuntu Server: Copy and pasted the displayed URL, and then from the browser, copied to token and pasted it into the prompt and continued.


Setting Project-wide Access Controls

To use GCE, an ssh key-pair needs to be set up. I used these commands (no passphrase entered):

ssh-keygen -t rsa -f ~/.ssh/google_compute_engine -C <username>
chmod 400 ~/.ssh/google_compute_engine


I think for the username, I should have used my Google email address (the “account” name), but I wasn’t sure, and had just used my login username “pcm”. On another machine I used my email.

To add the key as a project wide key, and to check that it is set up, use:

gcloud compute project-info add-metadata --metadata-from-file sshKeys=~/.ssh/google_compute_engine.pub
gcloud compute project-info describe


Kubernetes

If you haven’t already, clone a Kubernetes repo, which will be used by DinD and to run the tests. I pulled latest on master and the commit was at 12ba9bdc8c from July 17, 2017.


Final Check

You should have docker 17.06.0-ce, docker-machine 0.12.1 (or newer), recent Kubernetes repo.

Ubuntu: I had DinD repo at ~/dind/ and Kubernetes at ~/go/src/k8s.io/kubernetes/.

Native Mac: I had DinD repo at ~/workspace/dind/ and Kubenetes at ~/workspace/eclipse/src/k8s.io/kubernetes/.

YMMV.


Running E2E Tests Using GCE and Docker In Docker

Before running the tests, the cluster needs to be started. From the DinD area, source the gce-setup.sh script:

. gce-setup.sh

Be sure to watch all the log output for errors, especially in the beginning, where it is starting up the GCE instance. I’ve see errors with TLS certificates, and it continues as if it was working, but was not using GCE and actually created a local cluster. You can check the status of the cluster, by doing:

export PATH="$HOME/.kubeadm-dind-cluster:$PATH"
kubectl get nodes
kubectl get pods --all-namespaces


From the Google Console Compute page,  check that the VM instance is running. You can even SSH into the instance.

You can then move to the kubernetes repo area and run the E2E tests by using the dind-cluster.sh script in the DinD area. For example, with my Ubuntu setup (adjust the paths for your areas):

cd ~/go/src/k8s.io/kubernetes
~/dind/dind-cluster.sh e2e


This runs all the tests and you can examine the results at the end. For example:

Ran 144 of 651 Specs in 281.944 seconds
FAIL! -- 142 Passed | 2 Failed | 0 Pending | 507 Skipped

Ginkgo ran 1 suite in 4m42.880046761s


Cleaning Up

After you are done testing, you can tear down the cluster by using the dind-cluster.sh script. For example, in my Ubuntu setup (adjust the path for your setup):

~/dind/dind-cluster.sh down


You can then do the “clean” argument, if you want to delete images.

When you are done with your GCE instance, you can use the following command to delete the instance (assuming the default name of ‘k8s-dind’ for the instance, as created by the gce-setup.sh script), locally and remotely:

docker-machine rm -f k8s-dind


Running E2E Tests Using CGE (no DinD)

You can just run the E2E tests, using GCE, without using DinD.  In these instructions, I did this in a Ubuntu 16.04 VM. I suspect the same will apply to native Mac.

After moving to the top of the Kubernetes repo, I ran the following clear docker environment variables (testing failed before and this was suggested, in addition to ensuring docker commands can be run by the user and the docker daemon is running):

unset ${!DOCKER_*}


I’m not sure where this is documented, but in order to bring up/tear down the cluster properly, you need to first (only once) have done:

gcloud components install alpha
gcloud components install beta


To build, bring up the cluster, test, and shut down the cluster, use the following, replacing the project and zone values, as needed:

go run hack/e2e.go -- -v --provider=gce \
    --gcp-project <my-default-proj-name> \
    --gcp-zone <my-zone> \
    --build --up --test --down


Now, before you do this, you may want to also filter the test run, so that it doesn’t run every test (which takes a long time).  You can also use a subset of the options shown, so you could run this command with just “–build –up”, then run it with “–test”, and finally, run it with “–down”.

When using “–test” argument, you can add the filters. To run the conformance tests, you could add this to the command line:

--test_args="--ginkgo.focus=\[Conformance\]"

This takes about an hour to run the test part. You can skip serial tests with:

--test_args="--ginkgo.focus=\[Conformance\] --ginkgo.skip=\[Serial\]"


That shaved off a few minutes, but gave a passing run, when I tried it…

Ran 145 of 653 Specs in 3486.193 seconds
SUCCESS! -- 145 Passed | 0 Failed | 0 Pending | 508 Skipped PASS

Ginkgo ran 1 suite in 58m6.520458681s


To speed things up, you can add the following prefix to the “go run” line for the test:

GINKGO_PARALLEL=y


With that, the same tests only took under six minutes, but had 5 failures. A re-run, took under five minutes and had only one failure. I guess the tests aren’t too stable. 🙂

See the Kubernetes page on E2E testing for more examples of test options that you can do.

When you are done, be sure to run the command with the “–down” option so that the cluster is torn down (and all four of the instances in GCE are destroyed).


Building Sources

If you want to build images for the run (say you have code changes in controller or kubectl), you can do these two environment settings:

export BUILD_KUBEADM=y
export BUILD_HYPERKUBE=y


Next, since it will be building binaries, you need to be sourcing the gce-setup.sh script from within you Kubernetes repo root. For example, on my setup, I did:

cd ~/go/src/k8s.io/kubernetes
. ~/dind/gce-setup.sh


Note: The updated binaries will be placed into the containers that are running in the VM instance on Google Cloud. You can do “gcloud compute ssh root@k8s-dind” to access the instance (assuming the default instance name), and then from there, access the container with “docker exec -it kube-master /bin/bash” to access one of the containers.


Tips

  • When you run “gcloud info” it gives you lots of useful info about your project. In particular, there are lines that tell you the config file and log file locations:
User Config Directory: [/home/vagrant/.config/gcloud]
Active Configuration Name: [default]
Active Configuration Path: [/home/vagrant/.config/gcloud/configurations/config_default]
...
Logs Directory: [/home/vagrant/.config/gcloud/logs]
Last Log File: [/home/vagrant/.config/gcloud/logs/2017.07.19/14.17.21.874823.log]


  • In reading the docs, I found that the precedence for configuration settings are:
    1. Command line argument
    2. Default in metadata server
    3. Local client default
    4. Environment variable


Known Issues

As of this writing, here are the known issues (work-arounds are indicated in the blog):

  • Need docker-machine version 0.12.1 or newer
  • On native Mac, Docker for Mac does not support IPv6
  • Zone is hard coded in gce-setup.sh Fix upstreamed.
  • The dind-cluster.sh (and some of the version specific variants) have the -check-version-skew argument for the e2e.go program syntax incorrect. Fix upstreamed.
  • You have to confirm there are no errors, when running gce-setup.sh, and verify that the GCE instance is running.
Category: Kubernetes | Comments Off on Docker In Docker with GCE
July 13

KubeAdm Docker in Docker

In several of my blog posts, I’ve mentioned about using KubeAdm to start up a cluster and then do some development work. Some of the Kubernetes instructions mention using local-up-cluster.sh to bring up a single local cluster.

An alternative is to use Docker in Docker (DinD), where master and two minion nodes are brought up as containers on the host. Inside these “node” containers, there are containers for the cluster components running. For example, in the kube-master container, the controller, API server, scheduler, etc. containers will be running.

DinD supports both local and remote workflows, as well.


Using a VM

To run this in a VM (I used Vagrant/VirtualBox on a Mac), you’ll need to setup Ubuntu 16.04 (server in my case). I tried this with CentOS 7, but DinD failed to come up (see below).

Once you have the OS installed, have logged in, you can start the process. First, make sure that everything is up-to-date, and install the “extras” package:

sudo apt-get update -y
sudo apt-get upgrade  -y
sudo apt-get install linux-image-extra-$(uname -r) linux-image-extra-virtual


Next, install Docker by first downloading the keys, and adding the repository:

curl -fsSL https://download.docker.com/linux/ubuntu/gpg | sudo apt-key add -
sudo add-apt-repository "deb [arch=amd64] https://download.docker.com/linux/ubuntu $(lsb_release -cs) stable"
sudo apt-get update -y


Check that install will be from right place, by running this command:

apt-cache policy docker-ce


Install, and check that it is running:

sudo apt-get install -y docker-ce
sudo systemctl status docker


To allow the normal user to run docker commands, without using sudo, do:

sudo usermod -aG docker ${USER}


I checked the “docker version” (17.06.0-ce), “docker info | grep Storage” (aufs), and “unamkernel e -a” (4.4.0-51). With everything looking OK, I installed DinD:

mkdir ~/dind
cd ~/dind
wget https://cdn.rawgit.com/Mirantis/kubeadm-dind-cluster/master/fixed/dind-cluster-v1.6.sh
chmod +x dind-cluster-v1.6.sh


The cluster can now be brought up with:

./dind-cluster-v1.6.sh up


Once, this finishes, you have a three node cluster running in VMs. The output mentions of a dashboard available via a browser, but since I was running Ubuntu server, I couldn’t check that out (I was unable to forward to my host either). You can access the cluster using kubectl with:

export PATH="$HOME/.kubeadm-dind-cluster:$PATH"
kubectl get nodes
kubectl get pods --all-namespaces


Using a Bare Metal System

The process is identical as described in the VM case. If the bare metal system is behind a firewall, and a proxy is required,  you’ll run into issues (see below).


Problems Seen (and some workarounds, but unresolved)

Running on native MacOS

If you have Docker for Mac installed, you can bring up DinD on native MacOS. However, IPv6 is not yet supported for Docker for Mac, so I didn’t try this method (but others’ have for IPv4).

After installing Docker for Mac (to get docker command), you can wget DinD or clone the DinD repo (see below). Follow the same steps to run DinD, like with a VM.


Systems behind firewalls

First, docker will have problems talking to external servers to do pulls, etc. You can setup docker for a proxy server, by creating a file /etc/systemd/system/docker.service.d/http-proxy.conf with lines:

[Service]
Environment="HTTP_PROXY=http://<your-proxy-server>:80/"
Environment="HTTPS_PROXY=http://<your-proxy-server:80/"
Environment="NO_PROXY=localhost,127.0.0.1,<your-host-ip>,.<your-domain>"


Use your host and port number for the HTTP_PROXY/HTTPS_PROXY entries, your hosts IP and your domain (preceded by a dot) for the NO_PROXY. You can then reload the daemon and restart docker:

systemctl daemon-reload
systemctl start docker


I also set these three environment variables in my .bashrc file, so that they are added to the environment settings. For NO_PROXY, I also included 127.0.0.1, 10.192.0.{1..20}, 10.96.0.{1..20} (service network), and 10.244.0.{1..20} (some IPs on the pod network).

With those environment variable settings, I modified the dind-cluster-v1.6.sh script to add the proxy environment variables to the docker run command in dind:run portion of script:

  # Start the new container.
  docker run \
         -d --privileged \
         -e HTTP_PROXY="${HTTP_PROXY:-}" -e HTTPS_PROXY="${HTTPS_PROXY:-}" \
         --net kubeadm-dind-net \
…


This passes in the needed proxy information into the kube-master conatiner, so that external sites could be accessed.

Unfortunately, there is still a problem. The kube-master container’s docker is not setup for proxy access, so pulls fail from inside the container. You can look at the docker logs and see the pulls failing.

A workaround (hack) for now, is to add the same http-proxy.conf file to the kube-master container, reload docker daemon, and restart docker. Eventually, the API server (which was previously exiting), would come up, along with the rest of the cluster.

I suspect that the same issue will occur for all the (inner) containers, so we need a solution that sets up docker correctly for a proxy environment.


Using CentOS 7

I have not been successful with this, trying a VM or bare-metal. As DinD is starting up, I see a docker failure. Inside the kube-master container, docker has exited, and displays a message saying “Error starting daemon: error initializing graphdriver: driver not supported”.

Doing some investigation, I see that on the (outer) host, CentOS is using the “devicemapper” storage driver (verus “aufs” for Ubuntu). As of this writing, this is the only driver supported. Inside the kube-master container, the storage driver is “vfs”, which via the scripts, is using “overlay2” (the same as what Ubuntu uses). However, the OS is RHEL 4.8.5. It appears that this driver is not supported.

Update: As of commit 477c3e3, this should be working (I haven’t tested yet). They changed the driver from “overlay2” to “overlay”.


Building and Running DinD From Sources

Instead of using the prebuilt scripts, you can clone the DinD repo:

cd
git clone https://github.com/Mirantis/kubeadm-dind-cluster.git ~/dind
cd dind


The following environment variables should be set (and having a clone of the Kubernetes repo), to cause things to be built, as part bringing up a cluster:

export BUILD_KUBEADM=y
export BUILD_HYPERKUBE=y
./dind-cluster.sh up


You’ll need to do some hacking (as of this writing), to make this work. First, there is an issue with docker 17.06 ce, where the “docker wait” command hangs, if the container doesn’t exist. The workaround for now is to fall back to docker 17.03, instead of 17.06. You can follow the instructions on the Docker site, based on your operating system.

For Ubuntu, you can do “sudo apt-get install docker-ce=<version>” (not sure if that will be just 17.03). I didn’t do that, and instead hacked (as a temp fix) the destroy_container() function in the Kubernetes build/common.sh file.

Second, the dind-cluster.sh script (and the fixed/dind-cluster-v1.5.sh and fixed/dind-cluster-v1.7.sh scripts called from this script), have a line:

go run hack/e2e.go --v --test -check_version_skew=false --test_args='${test_args}'"


Apparently, the -check_version_skew argument has been changed to -check-version-skew. You can alter the script(s) to fix this issue.

Category: Kubernetes | Comments Off on KubeAdm Docker in Docker
June 7

Making Use of Kubernetes Test Infra Tools

The test team has a great summary page on test infrastructure. This blog just summarizes some of the pages, and as I learn more, will have some notes on the tools.

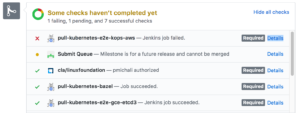
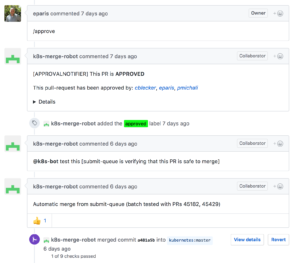
When you submit a Pull Request, there are several tests run, with the results reported in the PR:

Gubernator

If you click on the “Details”, it will take you to the gubernator page with the test results, failures (if any), and logs. You can go the Gubernator home page to see the jobs, where you can click on a job to see the history for a specific test (e.g. ci-kubernetes-build-1.7).

Test Grid

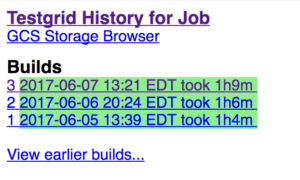
From the job page, there is a link to a detail page for another tool, TestGrid. This tools shows test results over time for jobs. The top level page has links for groups of tests, like “release 1.6 blocking”. From there, you can look at the results for a specific job. For example, you can see the kubelet 1.6 test results for the week, under the release 1.6 blocking tests.

The Summary link is very useful, for a group, as it will show how many tests failed and how many ran, for each test in the group, over the past week.

PR Dashboard

At the Gubernator home page is a link to the Pull Request Dashboard. This will show PRs of interest to you (you’re referenced in some manner). You may see Needs Attention for PRs that need review/approval, Approvable for reviews you could approve (if you have that capability), Incoming for review, and Outgoing for reviews you authored.

You can change the  user at the top to see someones dashboard, which can be useful, when looking for reviewers, as you can see their workload.


Prow

The top level test infrastructure tool Prow, shows PRs and jobs for several queues (?). The default is pre-commit, which is triggered to run when comments made on unmerged PRs. Another is the post-submit queue, which is triggered on every merge and/or push to branch. The periodic queue, is one that runs based on a timer (e.g. every 24 hours).  There is a batch queue that has several PRs being tested at once.

On the listing you can see the status of the job (check, X, or orange dot for in-progress), PR number(s), job name, start date/time, and duration. Clicking on the PR, takes you there. Clicking on the job, takes you to the test results.

You can do additional filtering (repo, author, job).


Submit Queue

The Submit Queue shows the PRs in queues. There are additional links to see PRs, merge history, and end-to-end test information with some health graphs. The info link shows the rules for how PRs are ordered in the merge queue, merge requirements, bot status, health, and a link to bot commands.

FYI: Erick Fejta gave a great presentation on the test infrastructure (a lot over my head :)). The slides are here.


Velodrome

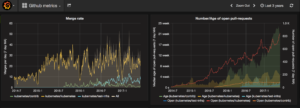
For those interested in the big picture, there is Velodrome. This has a bunch of graphs with metrics, like merge rate, number of open pull requests, number of comments, number of commenters, etc.

At the top left, there is a pulldown with other metrics besides “Github Metrics”, including developer velocity and monitoring.


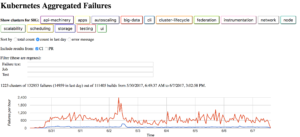
Triage Dashboard

If you are wondering a out failures by code area, visit the Triage Dashboard. You can see a graph of failures over time, along with a snippet of the error seen, and the job(s).

There are bunch of filters that can be applied, including text to search in the failure messages. Afraid I don’t have the secret decoder ring to fully understand this dashboard (yet).


Reference

Erick Fejta did a great recorded presentation at the 6/6/2017 SIG testing meeting on how the test infra currently works (slides). A great explanation of a very complex setup. The tools above are mentioned there.

Category: Kubernetes | Comments Off on Making Use of Kubernetes Test Infra Tools
May 30

End-To-End Testing

Updated 6/8/2017

I had been trying to follow the community page on end-to-end testing, but striking out. I gave it a try on native Mac (specifying KUBERNETES_PROVIDER=vagrant), on bare-metal, and inside a Virtual box VM running on a Mac. Each gave me different problems, which I’ll spare elaborating on in this blog. Instead, I’ll cut to the chase and describe what works…

One of the Kubernetes Developers (@ncdc) was kind enough to give me info on a working method, which I’ll elaborate on here.

Preparations

First, though, here is what I have for a setup:

  • Mac host (shouldn’t matter).
  • CentOS 7  Vagrant box with 40GB drive, running via VirtualBox.
  • VM has 8GB RAM and 2 CPUs configured.
  • Go 1.8.1 installed and $GOPATH setup. Created ~/go/src/k8s.io as a local work area.
  • Tools installed: git, docker, emacs (or your favorite editor).
  • Pull of Kubernetes repo from the work area (latest try used commit b77ed78):
    • git clone https://github.com/kubernetes/kubernetes.git

Started up the docker daemon with:

sudo systemctl enable docker && sudo systemctl start docker


After trying this whole E2E process on a fresh VM setup, I found that when I tried to run the tests, the ginkgo app was not found in the expected areas under _output/. To remedy this, I did “make”, which builds everything, including ginkgo, and places it in _output/local/go/bin/ginkgo. Maybe there is a way to just build ginkgo, but for now, this works.


Starting The Cluster

From my Kubernetes repo area, ~/go/src/k8s.io/kubernetes, I made sure that etcd was installed and PATH was updated, as suggested:

hack/install-etcd.sh
export PATH=$PATH:`pwd`/third_party/etcd


Next, build hyperkube and kubectl:

make WHAT='cmd/hyperkube cmd/kubectl'


You can then start up the cluster, using:

sudo LOG_LEVEL=4 API_HOST=10.0.2.15 ENABLE_RBAC=true -E PATH=$PATH \
     ./hack/local-up-cluster.sh -o _output/bin/

The API_HOST is set to the node’s main interface, which for a VirtualBox VM is usually 10.0.2.15. If you are running under root account (I haven’t tried that, so YMMV), you won’t need sudo and the “-E PATH=$PATH” clause. Feel free to use a different LOG_LEVEL, if desired, too.


Running Tests

Once everything is up, you’ll get a message on how to use the cluster from another window. So, I opened another terminal window, did “vagrant ssh” to access my VM, and changed to the Kubernetes directory. I did these commands to prepare for a test run:

sudo chown -R vagrant /var/run/kubernetes $HOME/.kube
export KUBERNETES_PROVIDER=local
export KUBECONFIG=/var/run/kubernetes/admin.kubeconfig


Where my user is “vagrant”. To prevent e2e failures, @ncdc told me to always do the chown command, after stopping and then restarting the cluster.

The cluster can be examined with kubectl script, like “cluster/kubectl.sh get nodes”

Now, you can run the end-to-end tests, with your desired ginkgo.focus. Here is an example:

go run ./hack/e2e.go -- -v -test -test_args '--ginkgo.v --ginkgo.focus Kubectl.expose'


At the end of the run, you’ll see this type of output:

Ran 1 of 631 Specs in 28.812 seconds
SUCCESS! -- 1 Passed | 0 Failed | 0 Pending | 630 Skipped PASS

Ginkgo ran 1 suite in 29.156205396s
Test Suite Passed
2017/05/30 13:40:55 util.go:131: Step './hack/ginkgo-e2e.sh -ginkgo.v -ginkgo.focus Kubectl.expose' finished in 29.254525787s
2017/05/30 13:40:55 e2e.go:80: Done


I ran Conformance tests, with:

go run ./hack/e2e.go -- -v -test -test_args '--ginkgo.v --ginkgo.focus \[Conformance\]'


At the end of the output, I could see the test results:

Ran 148 of 646 Specs in 3493.031 seconds
FAIL! -- 127 Passed | 21 Failed | 0 Pending | 498 Skipped --- FAIL: TestE2E (3493.05s)


All of these failures were under framework/pods.go and related to Volumes. Not sure what is wrong, but looks like some were failures to create pods due to security context:


Learning How To Focus

The ginkgo.focus argument is a regular expression that maps to the It() clauses in code in test/e2e/*. You cannot use quotes or spaces (so, use \s). For example, if I see that there are test cases that use the word Selector:

git grep Selector | egrep "It[(]"
test/e2e/network_policy.go: It("should enforce policy based on PodSelector [Feature:NetworkPolicy]", func() {
test/e2e/network_policy.go: It("should enforce multiple, stacked policies with overlapping podSelectors [Feature:NetworkPolicy]", func() {
test/e2e/network_policy.go: It("should enforce policy based on NamespaceSelector [Feature:NetworkPolicy]", func() {
test/e2e/scheduling/predicates.go: It("validates that NodeSelector is respected if not matching [Conformance]", func() {
test/e2e/scheduling/predicates.go: It("validates that NodeSelector is respected if matching [Conformance]", func() {
test/e2e/scheduling/predicates.go: It("validates that a pod with an invalid podAffinity is rejected because of the LabelSelectorRequirement is invalid", func() {

I can run the test with:

go run ./hack/e2e.go -- -v -test -test_args '--ginkgo.v --ginkgo.focus Selector'


It shows this near the end of the output:
Summarizing 2 Failures:

[Fail] [k8s.io] NetworkPolicy [It] should enforce policy based on NamespaceSelector [Feature:NetworkPolicy]
/home/vagrant/go/src/k8s.io/kubernetes/_output/local/go/src/k8s.io/kubernetes/test/e2e/network_policy.go:356

[Fail] [k8s.io] NetworkPolicy [It] should enforce policy based on PodSelector [Feature:NetworkPolicy]
/home/vagrant/go/src/k8s.io/kubernetes/_output/local/go/src/k8s.io/kubernetes/test/e2e/network_policy.go:356

Ran 6 of 646 Specs in 399.804 seconds
FAIL! -- 4 Passed | 2 Failed | 0 Pending | 640 Skipped --- FAIL: TestE2E (399.83s)


Being a regular expression, I could refine this to only running the three tests in networking_policy.go. First, I saw that the desired tests were under this section:

var _ = framework.KubeDescribe("NetworkPolicy", func() {
f := framework.NewDefaultFramework("network-policy")
...
    It("should enforce policy based on PodSelector [Feature:NetworkPolicy]", func() {
    ...

I then modified the test to run with this focus:

go run ./hack/e2e.go -- -v -test -test_args '--ginkgo.v --ginkgo.focus NetworkPolicy.*Selector'
...
Summarizing 2 Failures:

[Fail] [k8s.io] NetworkPolicy [It] should enforce policy based on NamespaceSelector [Feature:NetworkPolicy]
/home/vagrant/go/src/k8s.io/kubernetes/_output/local/go/src/k8s.io/kubernetes/test/e2e/network_policy.go:356

[Fail] [k8s.io] NetworkPolicy [It] should enforce policy based on PodSelector [Feature:NetworkPolicy]
/home/vagrant/go/src/k8s.io/kubernetes/_output/local/go/src/k8s.io/kubernetes/test/e2e/network_policy.go:356

Ran 3 of 646 Specs in 156.527 seconds
FAIL! -- 1 Passed | 2 Failed | 0 Pending | 643 Skipped --- FAIL: TestE2E (156.61s)


There are some example labels that can be used for the focus (and some examples that you could use are on that page as well). Hint: I wouldn’t run the test without any focus set…it takes a really long time.

When you are all done, in the first window, just press control-C to shutdown the cluster. Don’t forget to do the chown command above, if you restart the cluster.

Important Notes

A few things I found out…

Having a large disk drive will be important, as it is not easily resizable with Vagrant. I found that 40 GB was more than enough. Some vagrant boxes are only 20GB, and I’ve run out of space after using it for a while.


Be sure when you run the test, that you have the -v option after the double dash, or specify it inside the test_args string.


If you are changing your code, and then want to retest, you can run make for just cmd/hyperkube, and then re-run local-up-cluster.sh. Hyperkube is an all-in-one binary with kube-apiproxy, kubelet, kube-scheduler, kube-controller-manager, and kube-proxy.


You can use this setup for development work, although you’ll likely want to include additional tools, and maybe even play with kubeadm.


As of 5/31/2017, there is a bug in the tests that is preventing kubelet from starting. The fix is being worked under PR 46709. In the meantime though, you can start up the cluster with this:

sudo FEATURE_GATES=AllAlpha=false LOG_LEVEL=4 API_HOST=10.0.2.15 ENABLE_RBAC=true -E PATH=$PATH ./hack/local-up-cluster.sh -o _output/bin/

UPDATE: On 6/8/2017, I pulled the latest kubernetes and didn’t have to use this temp fix, so the change is upstreamed now.


Category: Kubernetes | Comments Off on End-To-End Testing
May 11

I’ve pushed up a Kubernetes change for review… now what?

Updated  V2 – 6/8/2017

I’m assuming you’ve already gone to the Community page on contributing, for information on how to find issues to work on, how to build and test Kubernetes, signing the Contributors License Agreement (CLA), and followed the link on how to do a pull request.

You code is up there, ready for review. Now what?

How do you know who is reviewing the code, and what the exact steps are?

What if it is not getting reviewed?

Hopefully, the notes here will help…

By the way…

If it’s your first commit, I highly recommend doing something super simple, so that you can get the process down, and not have something technically challenging as well. Using labels, you can look for low-hanging-fruit issues or issues for new contributors.

Pull Request Posted…Now What?

Once you’ve forked the Kubernetes repo, pushed your changes up to your repo, clicked on the “Compare and Pull Request”, and filled out the pull request, you’ll see several things happen.

The k8s-robot will take some actions to make sure that you have a signed CLA…

And that the commit needs an OK to be tested…

The k8s-reviewer bot may leave a comment indicating that the PR is “reviewable” over at reviewable.kubernetes.io (at time of this posting, this seems to be enabled only occasionally):

Lastly, the bot will assign a reviewer and provide some useful info…

Note that it indicates the OWNERS file. You can go to that file and see the approvers, and depending on the file, reviewers that could review the commit.

What do you do, if the reviewer doesn’t respond to the review?

From the kubernetes-dev Google group, Erick Fejta gave three suggestions. Here’s some elaboration on them…


Un-assign the current reviewer

To do this, you can add a comment for the review that looks like this:

Now, I did this, but forgot the ‘@’ symbol. It didn’t do anything, and folks pointed out that going back and editing the comment to add the at-sign would not help, because the bot only looks at new comments. Whoops.


Use the slack channel

  • Sign up for the Kubernetes “Team”, by going to slack.kubernetes.io. Once done, you can login at kubernetes.slack.com.
  • Find the channel for the code you are changing. In my case, I had changed code in k8s.io/apimachinery/pkg/… so I used the sig-api-machinery channel.
  • Ask on the channel for a recommendation of reviewers
  • Use the /assign comment (again with an at-sign before the user name(s) to assign the review to people recommended).

You can also look for the reviewer in Slack, and when they are available, touch base with them to see if they have bandwidth to review. Thats what I did in one case, and the person indicated they were wicked busy.


Use the Owners file

Above I showed that the bot indicated the OWNERS file. For one of my commits, it had this OWNERS file for federation with a bunch of reviewers. Some, like the apimachinery one, may only have approvers shown (which I guess double as reviewers).

Now, you could randomly assign from that list, but a better method it to take into consideration the work load of the reviewers. To do that, go to the Pull Request Dashboard and specify the reviewer’s name. You’ll get a page that has this right below the page banner, along with a list of the reviews the person is working on:

As you can see, ‘lavalamp’ was pretty busy, at the time of this review. You can enter other people’s names from the OWNERS file, into the text field and see how busy they are to make a better decision. I suspect you could even try to ping them on Slack to see if they have time to review. Also, you can click on “Me” and see your outgoing commits/reviews.

How To House Train Your Bot

There is info on the various bot commands, what they do, and who can use them. For example, I had a case where I put NONE in the release note section of the PR form, instead of “`NONE“`, and the bot had labeled my PR as needing a release note. I did the following, and the bot then removed the incorrect label and added the correct one:

No CNCF-CLA label?

I had one commit, where the k8s-ci-robot didn’t add in the cncf-cla label, like it should have. Here’s what you’d normally see:

In this commit, I had forgotten to add the “fixed #12345” in the first commit comment to indicate the issue fixed, but from what I hear, this should not affect the labelling, which should use the author and email address. I checked against other commits, and the info was the same.

I’m not sure why the bot didn’t add the label (even with a “no” instead of “yes”). Erick Fejta tried closing and reopening the PR, but that didn’t seem to work.

I did a rebase with Kubernetes master and then pushed up the code again, and this time, the bot added the label for “cncf-cla: yes”. One thing I had done differently, was that I was using a new VM for local development and in that VM, I had the remote for my kubernetes repo set up using https: protocol. I had, however, set up github to use SSH keys (forgot about that, when setting up the VM).

I changed the remote to use git: protocol, like this:

git remote set-url origin git@github.com:pmichali/kubernetes.git

I then re-pushed the change to my github on the same branch (with the -f option to force). The PR got the new commit, and the bot added the label!


Label Me Purple

There is a way to add labels to an issue. I saw the following done by a contributor (can be done by anyone):

As you can see, it added a label to the issue. There is also a “/area” bot command, which also creates a label. You can see the available labels.


Can I Kick Off Testing?

Well, it depends… If you are a Kubernetes member, you can do a “@k8s-bot ok to test” comment. For newbies, you won’t be a member, and will need to wait for a member to do this command to enable testing of the pull request.

Granted, if one of your tests fail, you can use the directions in the bot comment to resubmit that specific test. For example, I had a test failure reported and I just cut and pasted in the mentioned “@k8s-bot pull-kubernetes-federation-e2e-gce test this” to re-check this, once the failure (a flake) was fixed.

There is also a “/retest” comment that can be entered to have all the tests re-run.

See my blob entry on test infra tools for info on looking at test results, checking on the health of test jobs, etc.


What If My Code Is Not Ready For Review?

If you want to create a PR of some work-in-progress code, so people can see your changes, but are not ready for review, you can add the prefix “WIP” to the subject.

Looks Good To Me

Once the reviewer is happy with your changes, they’ll mark it as lgtm:

If an approver is not already assigned you, or the reviewer will want to assign them (you can refer to the OWNERS list):

Once they approve, you’ll see a bunch of bot activity to invoke the tests and complete the process, merging in the PR(assuming all things go well):

It’ll also provide a button to allow you to remove your branch, as it is no longer needed:


What’s Reviewable?

I noticed that some people go to the”Files changed” tab, and then add comments to the code. Other’s click on the Reviewable button on the page:

This takes you to a page, where you can review the code, add comments, acknowledge changes, indicate done, see what files have been reviewed and by whom, and see all the revisions. I’m still trying to figure out all the ins and outs of this tool, and will try to add notes here. TODO

Note, however, not all PRs will have the “reviewable” button (I’m not sure it is enabled all the time – maybe its use is in beta?).

One thing I see at the bottom of the page at the reviewable.kubernetes.io page for my commit is:

The last link indicates to open an issue with the Kubernetes repo to connect it to Reviewable. Not sure if I should make that request. Maybe someone can comment.


Category: Kubernetes | Comments Off on I’ve pushed up a Kubernetes change for review… now what?