Docker In Docker with GCE
V0.03
My previous post mentioned about setting up Docker in Docker (DinD). This one builds upon that, using Google Compute Engine (GCE) in the workflow, with the goal of running End-to-End (E2E) tests. A local host will be used for all the DinD development, and GCE will be used to bring up the cluster running the nodes in a GCE VM.
I’m going to give it a try on native MacOS, a VM running on a Mac (using Vagrant and VirtualBox), and eventually a bare metal system. BTW, Google has some getting starting information on the GCP, GCE, and other tools.
This journey will involve incrementally working up to the desired result. There’s a lot to do, so let’s get started…
Google Compute Engine
Account Setup
The first step is to setup a Google Cloud Platform account. You can sign up for a free trial and get a $300 credit, usable for the first 12 months. They won’t auto-charge your credit card, after the trial period ends.
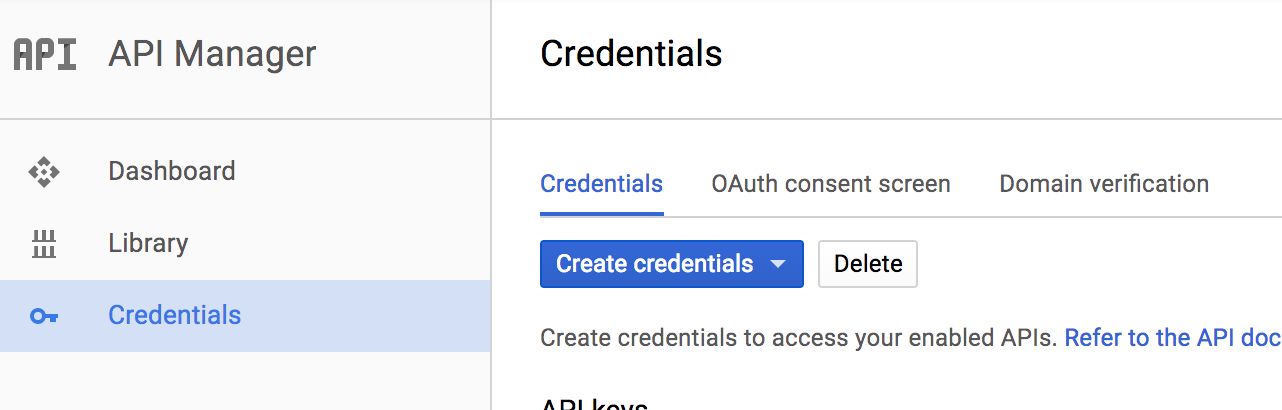
As part of the “Getting Started” steps, I went to the API Credentials page and created and API key:
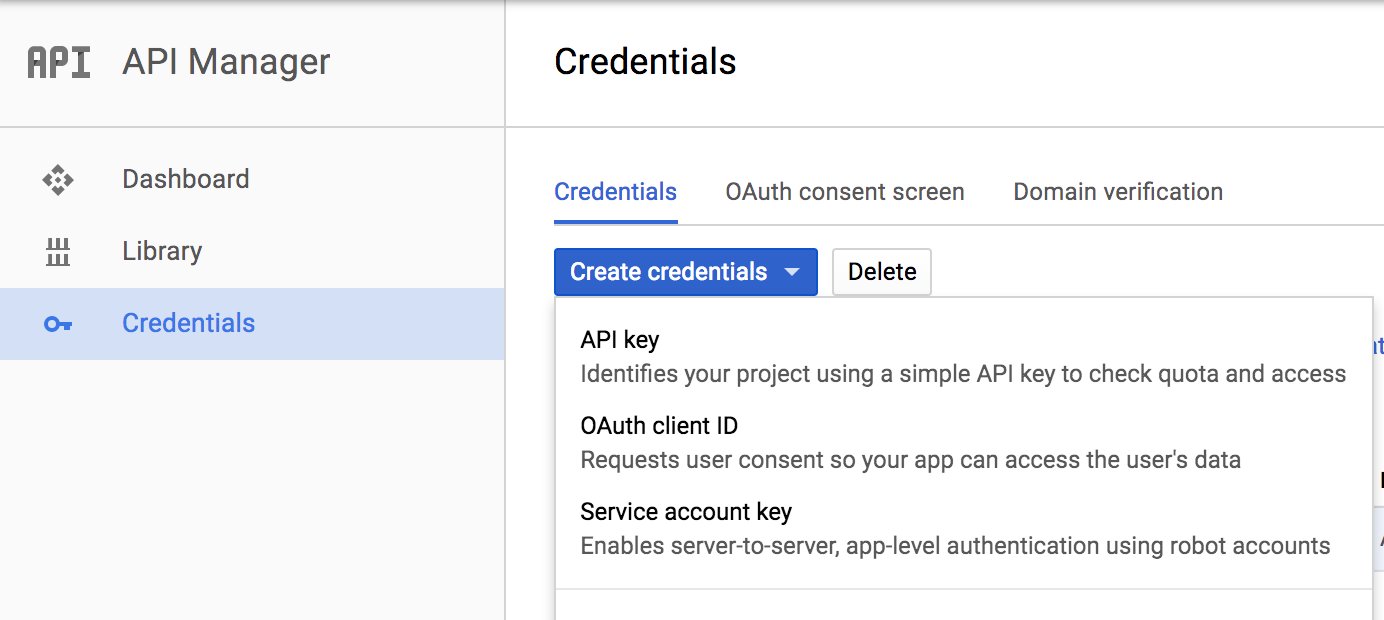
The next step is to create the “Service Account Key” and set roles for it. For now, I think you can skip these steps and proceed in the process, as I have not identified the right roles settings to create a VM instance. Instead, there are steps in the “Cloud SDK” section below, where an auth login is done, and that seems to set the correct roles to be able to create a VM.
For reference, the steps for the service key are to first select the “Service Account Key” from the pull-down menu:
Google has info on how to create the key. I selected a role as project owner for the service account. I suspect there are more roles that are needed here. Next, select to create a JSON file.
Take the downloaded JSON file and save it somewhere (I just put it in the same directory as the DinD repo). Specify this file in the environment variable setting for GCE, for example:
export GOOGLE_APPLICATION_CREDENTIALS=~/workspace/dind/<downloaded-file>.json
Just note that you either set the GOOGLE_APPLICATION_CREDENTIALS, or you use the “auth login” step below. If this environment variable is set, when doing the auth login, you’ll get an error.
Host Setup/Installs
Before we can go very far there are some things that need to be setup…
Make sure that your OS is up-to-date (Ubuntu: “sudo apt-get update -y && sudo apt-get upgrade -y”). Beyond any development tools (e.g. go, git) you may want to have around, there are some specific tools that need to be installed for using DinD and GCE.
DinD and Kubernetes Repos
For DinD, you can do:
git clone https://github.com/Mirantis/kubeadm-dind-cluster.git dind
Ubuntu: I place this under my home directory, ~/dind.
Native Mac: I happened to place it at ~/workspace/dind.
For Kubernetes, go to your Go source area, create a k8s.io subdirectory, and clone the repo:
git clone https://github.com/kubernetes/kubernetes.git
Install docker and docker-machine
Docker should be the latest (17.06.0-ce) and docker-machine needs to be 0.12.1 or later, due to some bugs. Install docker…
Ubuntu: Use the steps from KubeAdm Docker In Docker blog notes. Be sure to enable user to run docker without sudo. Check the version with “docker version”.
Native Mac: Install Docker For Mac. This will install docker and docker-machine, but you need to check the versions. Most likely (as of this writing), you’ll need to update docker-machine.
For docker-machine, you can install with:
curl -L https://github.com/docker/machine/releases/download/v0.12.1/docker-machine-`uname -s`-`uname -m` >/tmp/docker-machine
chmod +x /tmp/docker-machine
sudo cp /tmp/docker-machine /usr/local/bin/docker-machine
Cloud SDK
Instructions on cloud.google.com state to install/update to python 2.7, if you don’t have it already. Next, download the SDK package and extract:
wget https://dl.google.com/dl/cloudsdk/channels/rapid/downloads/google-cloud-sdk-162.0.0-darwin-x86_64.tar.gz
tar xzf google-cloud-sdk-162.0.0-darwin-x86_64.tar.gz
You can run google-cloud-sdk/install.sh to setup the path at login to include the tools. Log out and back in, so that the changes take effect.
Now, you can run “gcloud init” and follow the instructions to initialize everything…
I used the existing project that was defined for my Google Cloud account, when the account was created. I selected to enable GCE. For zone/region, I picked one for US east coast.
Ubuntu: As part of this process, the script asked me to go to a URL with my browser, and once I logged in using my Google account, and gave Google Cloud access, a key was displayed to paste into the prompt and compete init.
Now, “gcloud info” and “gcloud help” can be run to see the operations available. For authentication with API, I did:
gcloud auth application-default login
Native Mac: This brings up a browser window pointed to a URL where you log in and give access to the SDK.
Ubuntu Server: Copy and pasted the displayed URL, and then from the browser, copied to token and pasted it into the prompt and continued.
Setting Project-wide Access Controls
To use GCE, an ssh key-pair needs to be set up. I used these commands (no passphrase entered):
ssh-keygen -t rsa -f ~/.ssh/google_compute_engine -C <username>
chmod 400 ~/.ssh/google_compute_engine
I think for the username, I should have used my Google email address (the “account” name), but I wasn’t sure, and had just used my login username “pcm”. On another machine I used my email.
To add the key as a project wide key, and to check that it is set up, use:
gcloud compute project-info add-metadata --metadata-from-file sshKeys=~/.ssh/google_compute_engine.pub
gcloud compute project-info describe
Kubernetes
If you haven’t already, clone a Kubernetes repo, which will be used by DinD and to run the tests. I pulled latest on master and the commit was at 12ba9bdc8c from July 17, 2017.
Final Check
You should have docker 17.06.0-ce, docker-machine 0.12.1 (or newer), recent Kubernetes repo.
Ubuntu: I had DinD repo at ~/dind/ and Kubernetes at ~/go/src/k8s.io/kubernetes/.
Native Mac: I had DinD repo at ~/workspace/dind/ and Kubenetes at ~/workspace/eclipse/src/k8s.io/kubernetes/.
YMMV.
Running E2E Tests Using GCE and Docker In Docker
Before running the tests, the cluster needs to be started. From the DinD area, source the gce-setup.sh script:
. gce-setup.sh
Be sure to watch all the log output for errors, especially in the beginning, where it is starting up the GCE instance. I’ve see errors with TLS certificates, and it continues as if it was working, but was not using GCE and actually created a local cluster. You can check the status of the cluster, by doing:
export PATH="$HOME/.kubeadm-dind-cluster:$PATH"
kubectl get nodes
kubectl get pods --all-namespaces
From the Google Console Compute page, check that the VM instance is running. You can even SSH into the instance.
You can then move to the kubernetes repo area and run the E2E tests by using the dind-cluster.sh script in the DinD area. For example, with my Ubuntu setup (adjust the paths for your areas):
cd ~/go/src/k8s.io/kubernetes
~/dind/dind-cluster.sh e2e
This runs all the tests and you can examine the results at the end. For example:
Ran 144 of 651 Specs in 281.944 seconds
FAIL! -- 142 Passed | 2 Failed | 0 Pending | 507 Skipped

Ginkgo ran 1 suite in 4m42.880046761s
Cleaning Up
After you are done testing, you can tear down the cluster by using the dind-cluster.sh script. For example, in my Ubuntu setup (adjust the path for your setup):
~/dind/dind-cluster.sh down
You can then do the “clean” argument, if you want to delete images.
When you are done with your GCE instance, you can use the following command to delete the instance (assuming the default name of ‘k8s-dind’ for the instance, as created by the gce-setup.sh script), locally and remotely:
docker-machine rm -f k8s-dind
Running E2E Tests Using CGE (no DinD)
You can just run the E2E tests, using GCE, without using DinD. In these instructions, I did this in a Ubuntu 16.04 VM. I suspect the same will apply to native Mac.
After moving to the top of the Kubernetes repo, I ran the following clear docker environment variables (testing failed before and this was suggested, in addition to ensuring docker commands can be run by the user and the docker daemon is running):
unset ${!DOCKER_*}
I’m not sure where this is documented, but in order to bring up/tear down the cluster properly, you need to first (only once) have done:
gcloud components install alpha
gcloud components install beta
To build, bring up the cluster, test, and shut down the cluster, use the following, replacing the project and zone values, as needed:
go run hack/e2e.go -- -v --provider=gce \
    --gcp-project <my-default-proj-name> \
    --gcp-zone <my-zone> \
    --build --up --test --down
Now, before you do this, you may want to also filter the test run, so that it doesn’t run every test (which takes a long time). You can also use a subset of the options shown, so you could run this command with just “–build –up”, then run it with “–test”, and finally, run it with “–down”.
When using “–test” argument, you can add the filters. To run the conformance tests, you could add this to the command line:
--test_args="--ginkgo.focus=\[Conformance\]"
This takes about an hour to run the test part. You can skip serial tests with:
--test_args="--ginkgo.focus=\[Conformance\] --ginkgo.skip=\[Serial\]"
That shaved off a few minutes, but gave a passing run, when I tried it…
Ran 145 of 653 Specs in 3486.193 seconds
SUCCESS! -- 145 Passed | 0 Failed | 0 Pending | 508 Skipped PASS

Ginkgo ran 1 suite in 58m6.520458681s
To speed things up, you can add the following prefix to the “go run” line for the test:
GINKGO_PARALLEL=y
With that, the same tests only took under six minutes, but had 5 failures. A re-run, took under five minutes and had only one failure. I guess the tests aren’t too stable. 🙂
See the Kubernetes page on E2E testing for more examples of test options that you can do.
When you are done, be sure to run the command with the “–down” option so that the cluster is torn down (and all four of the instances in GCE are destroyed).
Building Sources
If you want to build images for the run (say you have code changes in controller or kubectl), you can do these two environment settings:
export BUILD_KUBEADM=y
export BUILD_HYPERKUBE=y
Next, since it will be building binaries, you need to be sourcing the gce-setup.sh script from within you Kubernetes repo root. For example, on my setup, I did:
cd ~/go/src/k8s.io/kubernetes
. ~/dind/gce-setup.sh
Note: The updated binaries will be placed into the containers that are running in the VM instance on Google Cloud. You can do “gcloud compute ssh root@k8s-dind” to access the instance (assuming the default instance name), and then from there, access the container with “docker exec -it kube-master /bin/bash” to access one of the containers.
Tips
- When you run “gcloud info” it gives you lots of useful info about your project. In particular, there are lines that tell you the config file and log file locations:
User Config Directory: [/home/vagrant/.config/gcloud]
Active Configuration Name: [default]
Active Configuration Path: [/home/vagrant/.config/gcloud/configurations/config_default]
...
Logs Directory: [/home/vagrant/.config/gcloud/logs]
Last Log File: [/home/vagrant/.config/gcloud/logs/2017.07.19/14.17.21.874823.log]
- In reading the docs, I found that the precedence for configuration settings are:
- Command line argument
- Default in metadata server
- Local client default
- Environment variable
Known Issues
As of this writing, here are the known issues (work-arounds are indicated in the blog):
- Need docker-machine version 0.12.1 or newer
- On native Mac, Docker for Mac does not support IPv6
Zone is hard coded in gce-setup.shFix upstreamed.The dind-cluster.sh (and some of the version specific variants) have the -check-version-skew argument for the e2e.go program syntax incorrect.Fix upstreamed.- You have to confirm there are no errors, when running gce-setup.sh, and verify that the GCE instance is running.